

Have you ever looked at a kitchen and felt like something was missing? Maybe the cabinets are stylish, the countertops are sleek, but the walls behind the stove and sink seem… bare. That’s where a kitchen backsplash comes in!
A backsplash is more than just a decorative element—it serves a practical purpose. It protects your walls from water splashes, grease stains, and everyday messes. But beyond that, the right backsplash can elevate your kitchen’s design, adding color, texture, and personality. Whether you want a modern, rustic, or classic look, a backsplash ties everything together.
In this guide, I’ll walk you through everything you need to know about how to select a backsplash for a kitchen!, from materials and colors to installation and maintenance. By the end, you’ll have all the knowledge you need to make an informed choice that suits both your style and budget.
Contents
Understanding the Purpose of a Kitchen Backsplash
Protecting Walls from Stains and Moisture (Waterproof Backsplash Options)
Kitchens are busy spaces where cooking, washing, and food prep happen daily. Without a backsplash, your walls become vulnerable to water damage, oil splatters, and food stains—especially behind the stove and sink.
That’s why waterproof backsplash options like glass, ceramic tile, and stainless steel are popular choices. They not only prevent moisture from seeping into the walls but also make cleaning a breeze. A quick wipe, and your backsplash looks as good as new!
Adding Style and Personality (Kitchen Backsplash Ideas)
A backsplash isn’t just functional—it’s a statement piece! It’s one of the easiest ways to infuse personality into your kitchen without a full remodel.
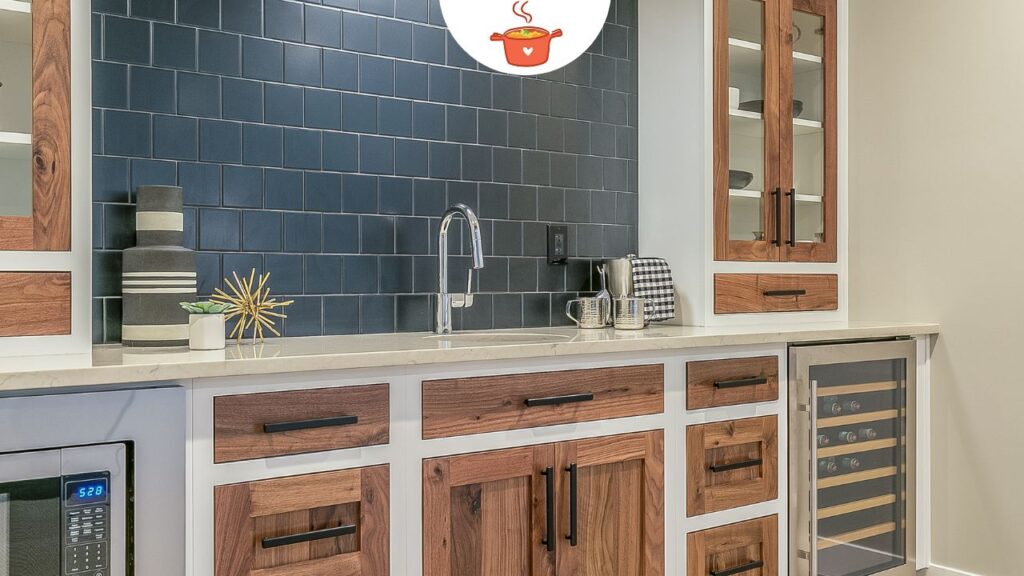
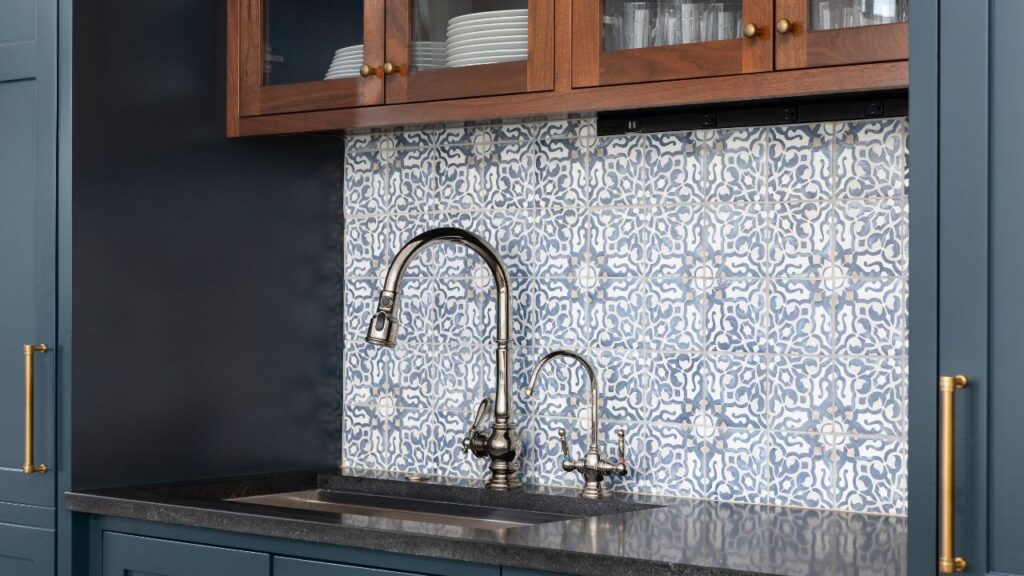
Want a sleek, modern vibe? A glass or subway tile backsplash could be perfect. Prefer something warm and rustic? Natural stone or a mosaic tile design might be the way to go. If you love bold designs, patterned ceramic tiles or colorful backsplashes can make your kitchen truly stand out.
No matter your style, there are endless kitchen backsplash ideas to explore, from minimalistic to extravagant.
Increasing Home Value with the Right Choice
Did you know that a well-chosen backsplash can increase your home’s resale value? Potential buyers often look for kitchens that are stylish, low-maintenance, and functional—and a backsplash checks all these boxes.
Investing in a durable and timeless backsplash, such as neutral subway tiles or a high-end glass finish, can make your kitchen more attractive to buyers. Even if you’re not planning to sell anytime soon, it’s a smart long-term investment that enhances both aesthetics and functionality.
Selecting the Perfect Color and Style
How to Choose a Backsplash Color That Complements Your Kitchen
The right backsplash color can tie your kitchen together, making it feel cohesive and well-designed. But how do you choose the best shade?
Here’s what I always recommend:
- Match the backsplash with existing elements – Look at your cabinets, countertops, and flooring. A well-coordinated backsplash should blend seamlessly with the overall color scheme.
- Decide on contrast vs. harmony – If your kitchen is neutral, a bold backsplash can add character. On the other hand, a soft, complementary shade can create a sleek, unified look.
- Consider natural light – Dark colors can make a space feel smaller, while light shades can open up the kitchen and make it feel airy.
Pro Tip: Bring home samples and hold them up against your kitchen surfaces in both natural and artificial light before making a final decision.
Matching Backsplash with Countertops (Matching Backsplash with Countertops)
The key to a well-balanced kitchen is making sure the backsplash complements your countertops. Here are some winning combinations:
| Countertop Material | Best Matching Backsplash Options |
|---|---|
| Granite (patterned) | Solid-colored subway tile or glass |
| Quartz (neutral tones) | Mosaic tile or ceramic in soft hues |
| Marble (veined) | White subway tile or complementary marble |
| Butcher block (wood) | White or light gray tile for contrast |
| Concrete (industrial look) | Stainless steel or matte-finish tiles |
If your countertop is busy with patterns, keep the backsplash simple. But if you have a plain countertop, you can go bold with textured or patterned tiles.
Best Backsplash Colors for Dark vs. Light Kitchens (Best Backsplash for White Cabinets)
The right color depends on your kitchen’s overall palette:
- For dark kitchens – Lighter backsplashes in white, cream, or soft gray brighten up the space.
- For light kitchens – Bold colors like navy, emerald green, or black add depth and contrast.
- For kitchens with white cabinets – Almost any backsplash works! The most popular choices are marble, gray subway tile, or patterned ceramic.
Trending Designs (Backsplash Trends 2025)
Backsplash trends evolve, but here are some of the hottest styles right now:
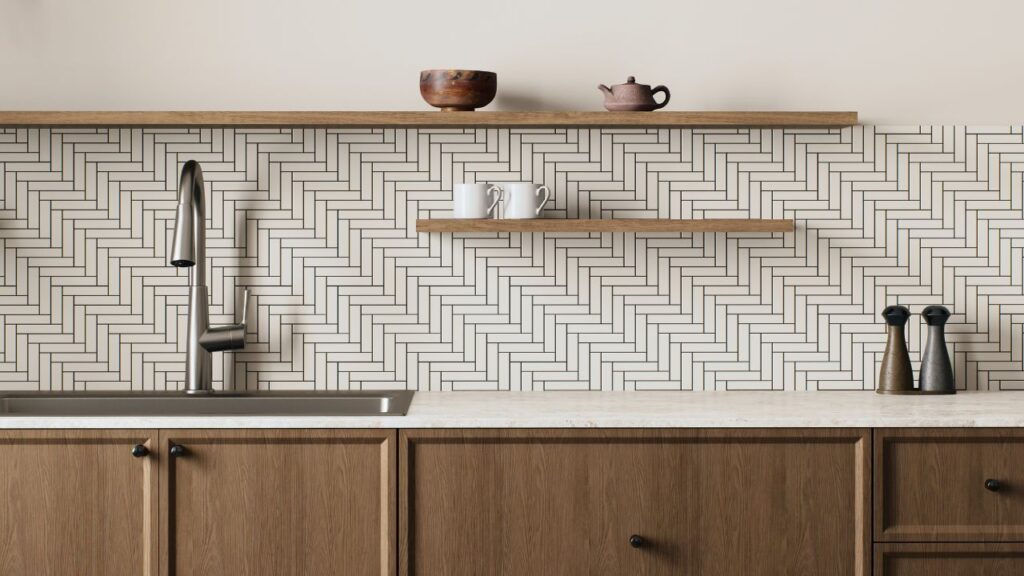
✔ Textured tiles – 3D effects that add dimension
✔ Bold geometric patterns – Hexagons, chevron, and fish-scale tiles
✔ Extended slab backsplashes – Using the same material as the countertops for a seamless look
✔ Earthy tones – Natural greens, warm terracottas, and muted blues
✔ Matte finishes – A modern alternative to glossy tiles
If you want a timeless look, subway tiles in white or gray never go out of style. But if you’re feeling adventurous, patterned and textured backsplashes are a fantastic way to add personality.
Budget Considerations: Finding an Affordable Yet Stylish Option
Cost Comparison of Different Backsplash Materials
Backsplashes come in a wide range of prices depending on the material. Here’s a quick breakdown:
| Material | Price per Square Foot (Approx.) | Pros | Cons |
|---|---|---|---|
| Ceramic Tile | $5 – $15 | Affordable, durable, easy to clean | Can chip over time |
| Glass Tile | $7 – $30 | Sleek, modern, stain-resistant | Can be expensive |
| Natural Stone | $10 – $50 | Luxurious, unique textures | Requires sealing |
| Peel-and-Stick | $3 – $10 | Budget-friendly, DIY-friendly | Less durable |
| Stainless Steel | $20 – $40 | Heat-resistant, modern look | Shows fingerprints |
Pro Tip: If you’re on a tight budget, consider peel-and-stick backsplash options or ceramic tiles. They provide great style without breaking the bank!
DIY Backsplash Installation vs. Hiring a Professional (DIY Backsplash Installation)
If you’re handy with tools, installing a backsplash yourself can save you hundreds of dollars. Here’s a quick comparison:
| Installation Method | Pros | Cons |
|---|---|---|
| DIY Installation | Saves money, creative control | Time-consuming, requires skill |
| Professional Help | Expert finish, no stress | Higher cost ($300-$800) |
DIY-friendly options like peel-and-stick tiles or simple subway tile designs are great for beginners. But if you’re installing intricate mosaic tiles or heavy stone, it’s best to hire a pro.
Smart Tips to Save Money Without Compromising Style
Want a stylish backsplash on a budget? Here are some smart tips:
✅ Mix materials – Use high-end tiles for a small focal area and budget-friendly ones elsewhere.
✅ Choose classic styles – Subway tiles are affordable and timeless.
✅ DIY whenever possible – A simple ceramic tile backsplash can be a fun weekend project.
✅ Look for clearance deals – Many home improvement stores offer discounted tiles on clearance.
✅ Consider peel-and-stick options – If you’re renting or want a temporary update, these are affordable and easy to install.
Installation Guide: DIY vs. Professional Help
Step-by-Step DIY Backsplash Installation Tips
If you’re a hands-on homeowner who loves DIY projects, installing a backsplash can be a rewarding and cost-saving task. Here’s a step-by-step guide to help you get started:
- Measure and Plan – Determine the total area you need to cover. Purchase 10% extra material to account for cuts and mistakes.
- Gather Tools and Materials – You’ll need tile adhesive, a notched trowel, spacers, a tile cutter, grout, a sponge, and a level.
- Prepare the Surface – Ensure the wall is clean, dry, and smooth. Sand rough spots and patch any holes.
- Lay Out Your Design – Arrange tiles on a flat surface to visualize the final look before attaching them.
- Apply Adhesive and Install Tiles – Spread tile adhesive evenly using a notched trowel. Press tiles into place, using spacers for uniform gaps.
- Allow to Set – Let the adhesive dry for 24 hours before applying grout.
- Grout the Tiles – Fill gaps with grout, wiping away excess with a damp sponge.
- Seal and Finish – Use a sealant to protect grout and tiles, ensuring longevity.
Common Mistakes to Avoid
- Skipping Surface Preparation – Uneven surfaces lead to poor adhesion.
- Not Using Spacers – Inconsistent tile gaps can ruin the final look.
- Applying Too Much Adhesive – This causes tiles to slide or create an uneven surface.
- Neglecting to Seal Grout – Unsealed grout absorbs moisture and stains easily.
When to Hire a Professional for Complex Designs
While DIY backsplash installation is achievable for many, some situations call for professional expertise:
- Intricate Patterns and Mosaics – Complex designs require precision and experience.
- Heavy Materials Like Natural Stone – These may need specialized cutting and sealing.
- Large Kitchen Areas – Professional installation ensures efficiency and a flawless finish.
- Waterproofing Needs – Essential for backsplashes behind sinks and stoves.
Maintenance and Longevity
Cleaning Tips for Different Backsplash Materials
Maintaining your backsplash keeps your kitchen looking fresh. Here’s how to clean different materials:
| Backsplash Material | Cleaning Method |
|---|---|
| Tile | Wipe with a damp cloth and mild detergent; avoid harsh chemicals. |
| Glass | Use glass cleaner for a streak-free shine. |
| Stainless Steel | Clean with a mixture of vinegar and water to prevent smudges. |
| Natural Stone | Use a pH-neutral cleaner to avoid surface damage. |
| Peel-and-Stick | Wipe with a damp cloth; avoid excessive moisture. |
Preventing Damage and Stains
- Use a Backsplash Protector – Clear acrylic shields prevent splashes behind the stove.
- Wipe Spills Immediately – Prevents stains from setting into porous surfaces.
- Re-seal Grout and Stone Annually – Protects against moisture and stains.
Best Long-Lasting Options for a Busy Kitchen
For high-traffic kitchens, durability is key. Consider these options:
- Porcelain or Ceramic Tile – Resistant to stains and heat.
- Tempered Glass – Easy to clean and modern in appearance.
- Metal or Stainless Steel – Industrial-grade durability and heat resistance.
- Quartz Slabs – Seamless and low maintenance.
Conclusion
Choosing the right backsplash is about balancing style, functionality, and budget. Whether you opt for a DIY installation or hire a professional, the key is selecting a material that complements your kitchen’s design and lifestyle.
Now it’s your turn! What’s your favorite backsplash style? Have any installation tips or experiences to share? Drop your thoughts in the comments below!