

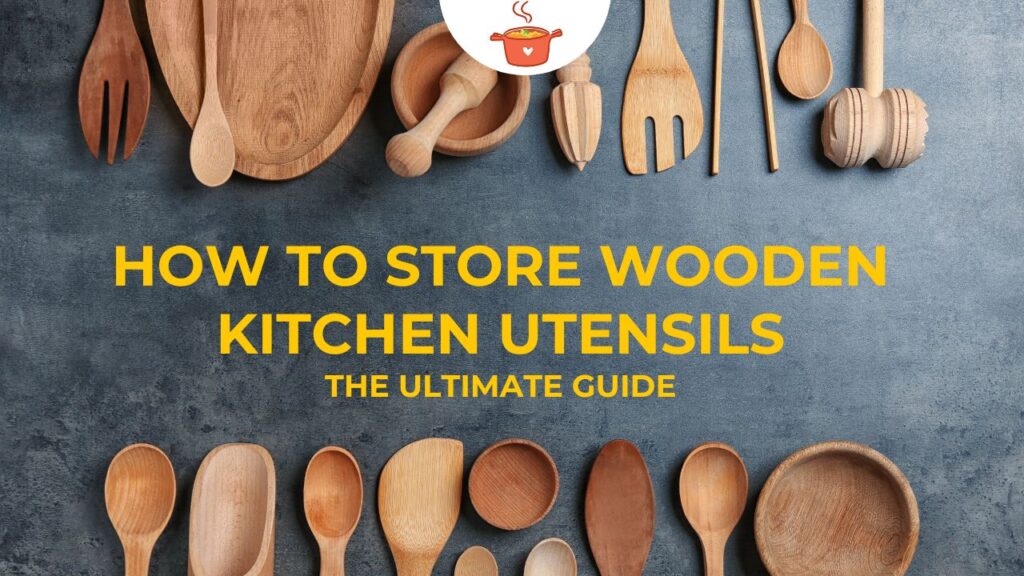
Hey everyone! I’m so glad you’re here. Let’s talk about something near and dear to my heart – and likely yours too if you’re reading this – our trusty wooden kitchen utensils. You know, I’ve been organizing kitchens for years, and one thing I’ve noticed is that people often overlook the importance of proper storage for their wooden tools.
It’s a bit of a shame, really. Did you know that how to store wooden kitchen utensils can actually make or break their lifespan? It’s true! I’ve seen it happen time and time again. Improper storage can lead to all sorts of problems, like warping, cracking, and even the dreaded mold. Yuck, right? No one wants that!
But don’t worry, that’s why I’m here! We’ll get into the nitty-gritty of wooden utensil storage together. You’ll learn how to keep your beloved wooden spoons, spatulas, and cutting boards in pristine condition, so they last you for years to come. We will discuss about common issues caused by improper storage. I think, you will find answers about, “How to prevent mold on wooden kitchen utensils” here. Trust me, taking care of your wooden tools isn’t as hard as you might think. With a few simple tricks, you’ll be a wooden utensil care pro in no time! And I promise to make it fun – no boring lectures here! Let’s get started on this journey to happy, healthy wooden utensils.
Contents
Why Proper Storage is Essential for Wooden Kitchen Utensils
Alright, so we know that neglecting our wooden utensils is a no-no, but let’s dig a little deeper. Why is proper storage so important? Well, it all comes down to the nature of wood itself. You see, wood is a natural material, and like all natural things, it’s affected by its environment. Think of it like this: you wouldn’t leave a plant out in the freezing cold or scorching heat without expecting some consequences, right? Same idea with your wooden kitchen tools.
The Impact of the Elements One of my client, asked me once, “What is best way for wooden kitchen utensil maintenance?” I replied her, “Understanding elements is the key.” Humidity, temperature swings, and even exposure to air can wreak havoc on your wooden spoons and spatulas.
- Humidity: Too much moisture in the air can cause the wood to absorb water, leading to swelling, warping, and even cracking. I always avoid keeping wooden utensils beside the sink or any humid place. On the other hand, a super dry environment can cause the wood to dry out and become brittle. It’s all about finding that happy medium!
- Temperature: Extreme heat can dry out and damage the wood, while fluctuating temperatures can cause the wood to expand and contract, leading to cracks. I once had a client who stored their wooden utensils right next to the oven – big mistake!
- Air Exposure: While some airflow is good, leaving wooden utensils constantly exposed to the elements can cause them to dry out. And, if it is a humid place, then it can cause excessive moisture absorption. It’s all about balance.
Extending Lifespan and Functionality
Now, here’s the good news: storing wooden utensils correctly can significantly extend their lifespan. Proper care for wooden utensils is the best way for avoiding damage to wooden spoons. I’ve seen well-cared-for wooden spoons that have lasted for decades – seriously! They become like old friends in the kitchen. Plus, proper storage helps them maintain their functionality. A warped spatula or a cracked spoon isn’t going to do you much good, is it?
So, to keep your wooden utensils happy and helpful, you want to protect them from these environmental stressors. It’s like giving them a cozy, comfortable home where they can thrive. Make sense?
Here is a table, where I have explained about the impact of elements:
| Element | Impact on Wooden Utensils | My Recommendations |
|---|---|---|
| Humidity | High humidity leads to swelling, warping, cracking; low humidity causes drying and brittleness. | Maintain moderate humidity; use a humidifier or dehumidifier if necessary. |
| Temperature | Extreme heat dries and damages wood; fluctuating temperatures cause expansion and contraction, leading to cracks. | Store away from heat sources like ovens and direct sunlight. |
| Air Exposure | Excessive exposure can dry out wood; in humid environments, it can cause excessive moisture absorption leading to mold growth. | Use storage containers that allow some airflow but protect from constant exposure and humidity. |
Alright, let’s get practical! Now that we understand why proper storage matters, let’s talk about how to do it right.
The Best Ways to Store Wooden Kitchen Utensils
Okay, folks, this is where the magic happens. Implementing the right storage methods can make all the difference. I’ve tried countless methods over the years, and I’m excited to share my tried-and-true favorites with you. Let’s break it down by utensil type:
Storing Wooden Spoons & Spatulas
Your trusty spoons and spatulas are probably your most-used wooden tools, so let’s start there. Here’s my advice, you will find answers here about, “Best way to store wooden spoons“
- Airflow is Key: You want to let these guys breathe a bit. Avoid cramming them tightly into a drawer where moisture can get trapped. One of the best wooden spatula storage solutions is using utensil holders.
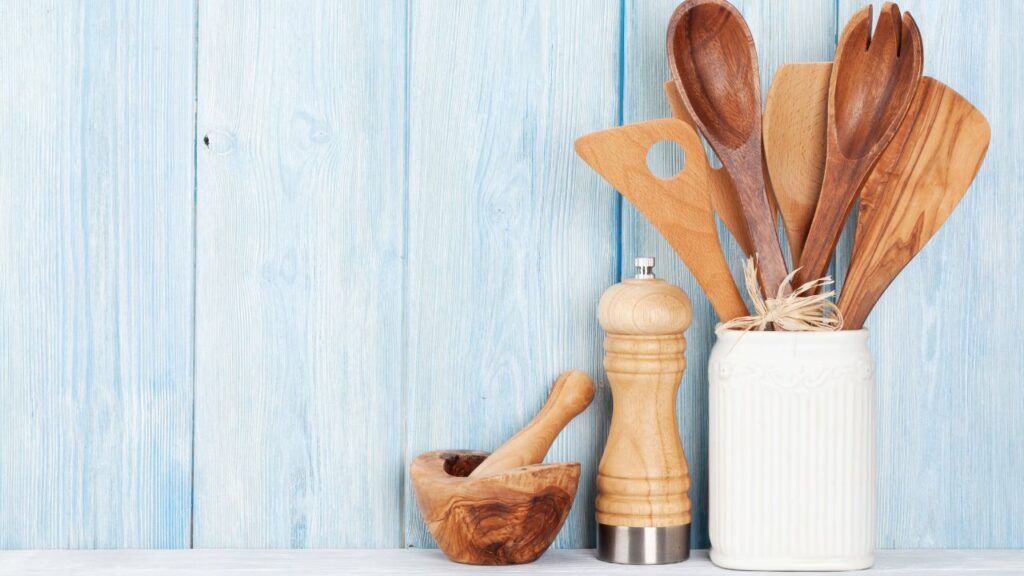
- Upright Storage: I’m a big fan of storing spoons and spatulas upright in a ceramic or wooden utensil holder. This allows for excellent air circulation and prevents them from getting squished. I personally use a beautiful ceramic crock that I found at a local craft fair – it adds a nice touch to my kitchen counter, too!
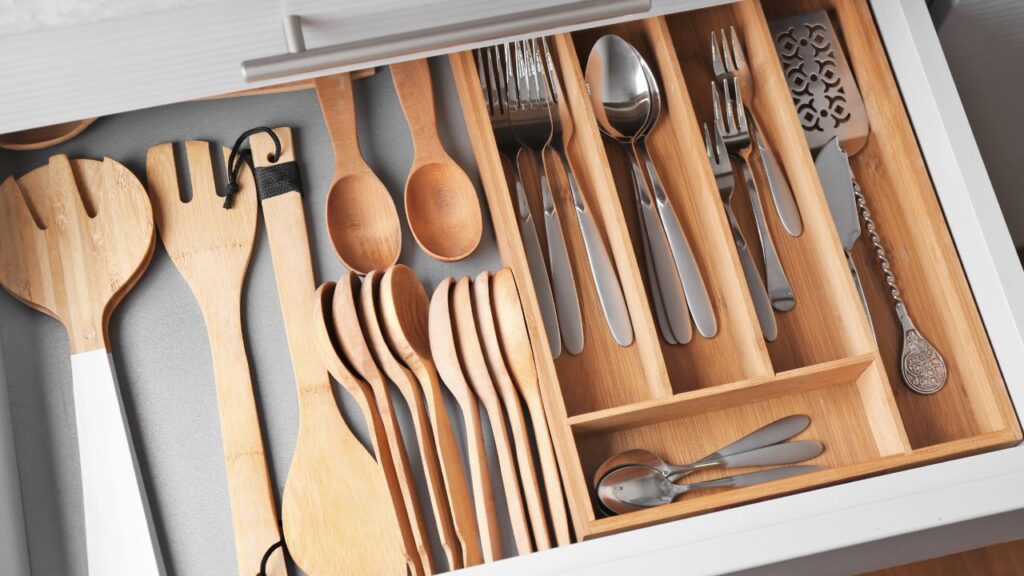
- Drawer Organizers (with a Caveat): If you prefer to keep them in a drawer, make sure to use a drawer organizer with dividers. This keeps them separated and allows for some airflow. But remember, don’t overcrowd the drawer! A bamboo utensil holder can be a good choice for utensil drawer organizers.
Storage for Wooden Cutting Boards
Cutting boards need a bit of special attention. Here is my tips for storing wooden cutting boards:
- Stand Them Up: The best way to store a cutting board is on its side, standing upright. This allows for maximum airflow on both sides, which is crucial for preventing warping and cracking. Protecting wooden kitchen tools like cutting boards is easy, if you can make a habit of storing them upright.
- Use a Rack: A simple dish rack or a specially designed cutting board rack works wonders. I have a slim metal rack that fits perfectly on my countertop, and it keeps my boards neatly organized and dry.
- Avoid Stacking When Wet: Never stack cutting boards on top of each other when they’re wet – that’s a recipe for disaster! You’ll trap moisture and create a breeding ground for mold.
Avoiding Mold and Mildew
Speaking of mold, let’s talk about how to prevent that nasty stuff. Nobody wants a moldy spoon, right? Preventing mold on wooden utensils is easy if you follow these:
- Dry Thoroughly: This is probably the most important tip. After washing, make sure your utensils are completely dry before storing them. I like to pat them dry with a clean towel and then let them air dry for a bit longer just to be sure. Using a utensil drying rack is the best practice.
- Good Ventilation: As we’ve discussed, good airflow is essential for preventing moisture buildup. So, choose storage methods that allow for ventilation.
- Don’t Soak for Extended Periods: Avoid leaving your wooden utensils soaking in water for long periods. This can damage the wood and make it more susceptible to mold.
Use of Storage Containers for Wooden Utensils
Let’s talk about containers. The right container can be a great way to store your wooden utensils while keeping them protected. I love using storage containers. If you want to know about best wooden utensil storage containers, then keep reading,
- Material Matters: Look for containers made from breathable materials like wood, ceramic, or even certain types of metal with ventilation holes. I’m personally a fan of wooden utensil storage boxes – they look great and provide a natural environment for the wood. A bamboo utensil holder is another great choice.
- Size it Right: Choose a container that’s large enough to hold your utensils comfortably without overcrowding them. You can find different types of wooden utensil rack in the market. You can choose according to your need.
- Consider a Lid (Sometimes): A lid can be helpful for keeping dust and other debris off your utensils, but make sure it’s not airtight. You still want some airflow to prevent moisture buildup. You will find different types of wooden utensil storage ideas on the internet, but you have to choose the best one.
Here is a table where I have summarized my preferred methods:
| Utensil Type | Preferred Storage Method | Why It Works |
|---|---|---|
| Spoons & Spatulas | Upright in a ceramic or wooden utensil holder | Excellent airflow, prevents squishing, and looks attractive on the counter. |
| Cutting Boards | Standing upright on its side, in a rack | Maximum airflow on both sides, prevents warping and cracking. |
| All Wooden Utensils | In breathable containers (wood, ceramic, vented metal) | Protects from dust and debris while allowing for ventilation, prevents moisture buildup. |
Okay, let’s get those utensils squeaky clean and prepped for storage!
How to Properly Clean Wooden Utensils Before Storing
Alright, so you’ve used your trusty wooden spoons and spatulas – now it’s time to give them a good cleaning before they go into their cozy storage spots. Proper cleaning is just as important as proper storage, folks! It is important for wooden utensil longevity. Here is my tips for cleaning and storing wooden kitchen tools:
Gentle Cleaning is Key
- Hand Wash Only: Resist the urge to toss your wooden utensils in the dishwasher! The harsh detergents, high heat, and prolonged exposure to water are a recipe for disaster. Stick to hand washing, it’s the best way to avoid damaging these tools.
- Mild Soap and Warm Water: Use a mild dish soap and warm water. I like to use a soft-bristled brush or a non-abrasive sponge to gently scrub away any food particles. I use mild dish soap, that I use for washing baby bottles.
- Don’t Soak: I mentioned this before, but it’s worth repeating – don’t let your wooden utensils soak in water for extended periods. This can cause them to warp, crack, and become a breeding ground for bacteria. If you need to do wooden utensil sanitizing, then don’t soak them for more than 2-3 minutes.
- Rinse Thoroughly: Make sure to rinse all the soap residue off completely.
Drying Techniques: The Crucial Step
Drying is just as important as washing! Here’s how to dry wooden spoons properly:
- Pat Dry: Use a clean, absorbent towel to pat your utensils dry immediately after washing.
- Air Dry Completely: Even after patting them dry, I always recommend letting them air dry completely before storing them. This ensures that no residual moisture is trapped in the wood. You can stand them upright in your utensil holder or lay them flat on a drying rack. Wooden utensil drying is a crucial step.
Storing After Cleaning
Once your utensils are completely dry, they’re ready for storage! Just follow the storage tips we discussed in the previous section, and you’ll be good to go.
Common Mistakes to Avoid When Storing Wooden Kitchen Utensils
Alright, let’s talk about some common storage mistakes that can seriously damage your wooden utensils. I’ve seen these mistakes made time and time again, so I want to make sure you avoid them!
- Storing Them Wet: This is probably the biggest no-no. Storing wet utensils traps moisture, leading to mold, mildew, warping, and cracking. Always ensure they are bone-dry before putting them away. If you want to protect wooden kitchen tools, then avoid storing them wet.
- Storing Them in Airtight Containers: While containers can be great, avoid airtight ones. Your wooden utensils need to breathe! Trapping them in an airtight environment can lead to moisture buildup.
- Overcrowding: Don’t cram too many utensils into a drawer or container. They need space for air to circulate.
- Storing Near Heat Sources: Keep your wooden utensils away from ovens, stovetops, and direct sunlight. Heat can dry out and damage the wood.
Bonus: DIY Wooden Utensil Storage Ideas
Now for the fun part – let’s get creative with some DIY storage solutions! These ideas are not only practical but can also add a touch of personality to your kitchen. Here are a few of my favorites, and they are great wooden kitchen utensil shelf ideas:
- Repurposed Containers: Get thrifty and repurpose old jars, ceramic crocks, or even wooden boxes as utensil holders. Just make sure they’re clean and allow for airflow.
- Magnetic Knife Strip (Modified): You can use a magnetic knife strip to hold metal utensils, and then attach small hooks or pegs to the bottom to hang your wooden spoons and spatulas.
- Hanging Rack: Install a simple wooden dowel or a repurposed curtain rod on the wall and use S-hooks to hang your utensils. You can also use wooden utensil storage hooks or wooden utensil storage pegs.
There are plenty of ideas for wooden utensil storage racks, wooden utensil storage drawers, wooden utensil storage baskets, wooden utensil storage jars, wooden utensil storage trays, wooden utensil storage cabinets and wooden utensil storage stands. You just need to choose, which one is best for you. You can even build wooden utensil storage boxes by yourself. But, I don’t recommend it, if you don’t have proper knowledge about woodworking.
Conclusion
Well, there you have it, folks! We’ve covered everything you need to know about storing your wooden kitchen utensils. To wrap things up, let’s do a quick recap of the key takeaways:
Proper wooden utensil storage is essential for preventing damage like warping, cracking, and mold. It helps extend the lifespan of your utensils and keeps them functioning properly. By following the cleaning and storage tips we’ve discussed, you can ensure that your wooden tools stay in great shape for years to come. Wooden utensil care and wooden kitchen utensil maintenance are not difficult, right?
Remember, your wooden utensils are more than just tools – they’re an investment in your kitchen and your cooking. Treat them with care, and they’ll reward you with years of faithful service!